Flask
For this post this week I will be creating a simple app using Flask that will allow users to post comments, it will also be password protected so it doesn't get full with spam. Please go to jpernick.pythonanywhere.com and comment to see it in action!
Getting Started
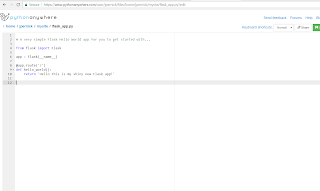
What are some benefits of using Flask? Flask is relatively new, only in use since 2010. It is considered more python-like because the code is more explicit in most cases. Flask is great for beginners because it is very simply to get a simple app on the web. The Flask app is created the on pythonanywhere.com the same way the Django app was started, by simply going to the files tab and clicking create a new site. This creates a mysite directory and a file called flask_app.py which contains the simple code of the website: *Please click on pictures to enlarge them

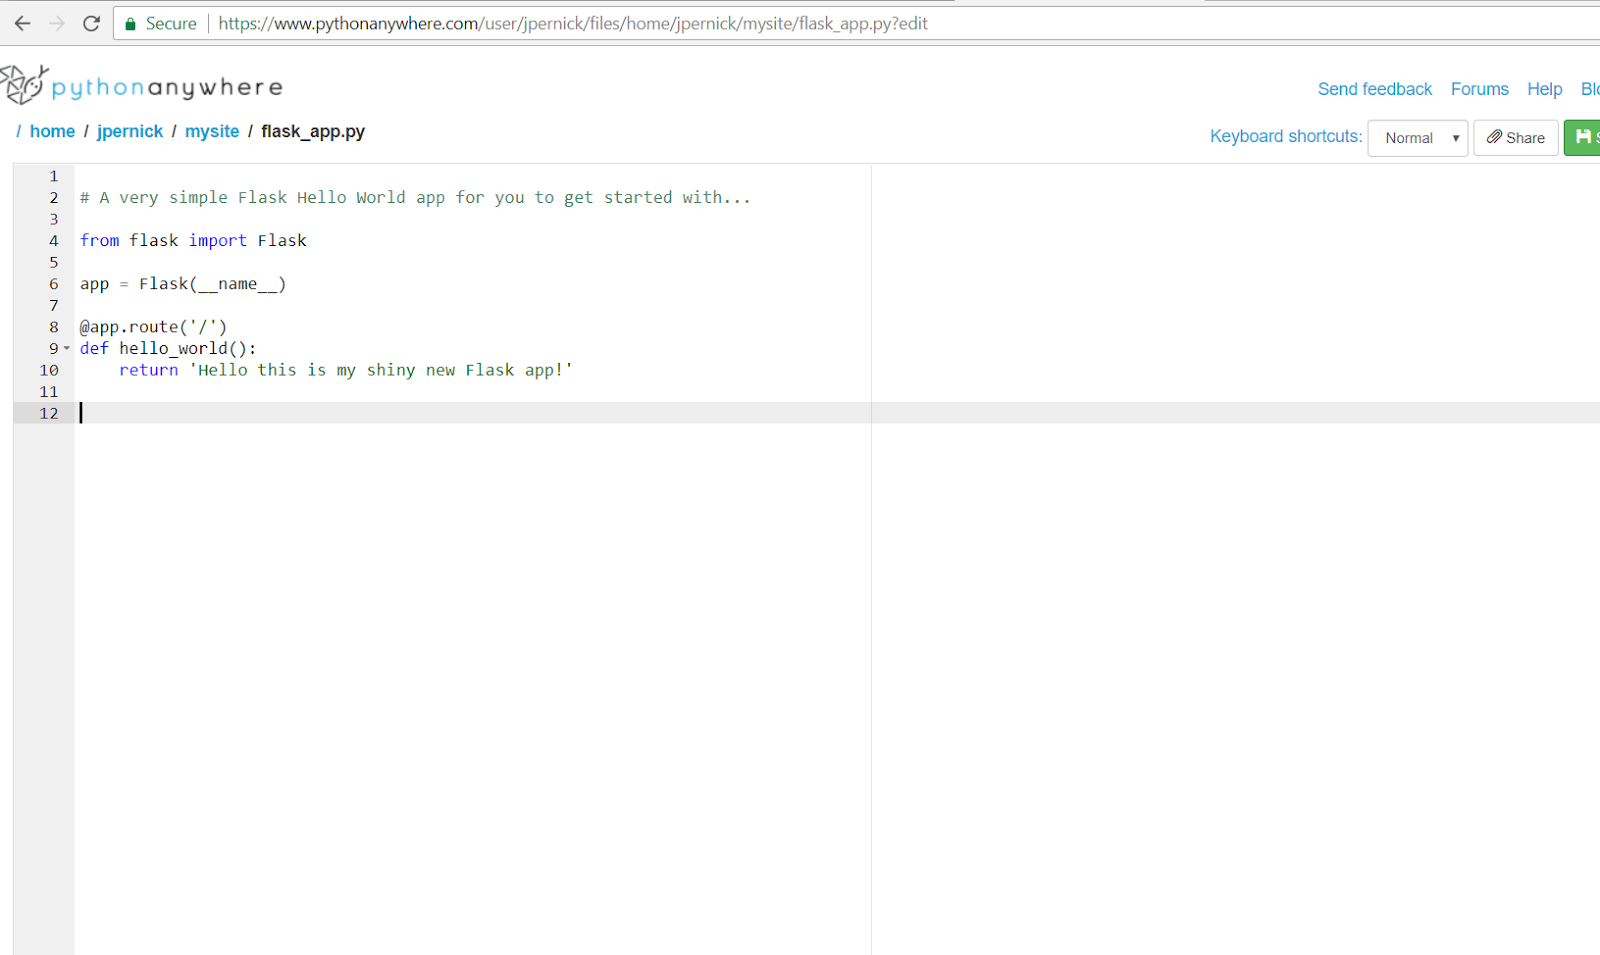
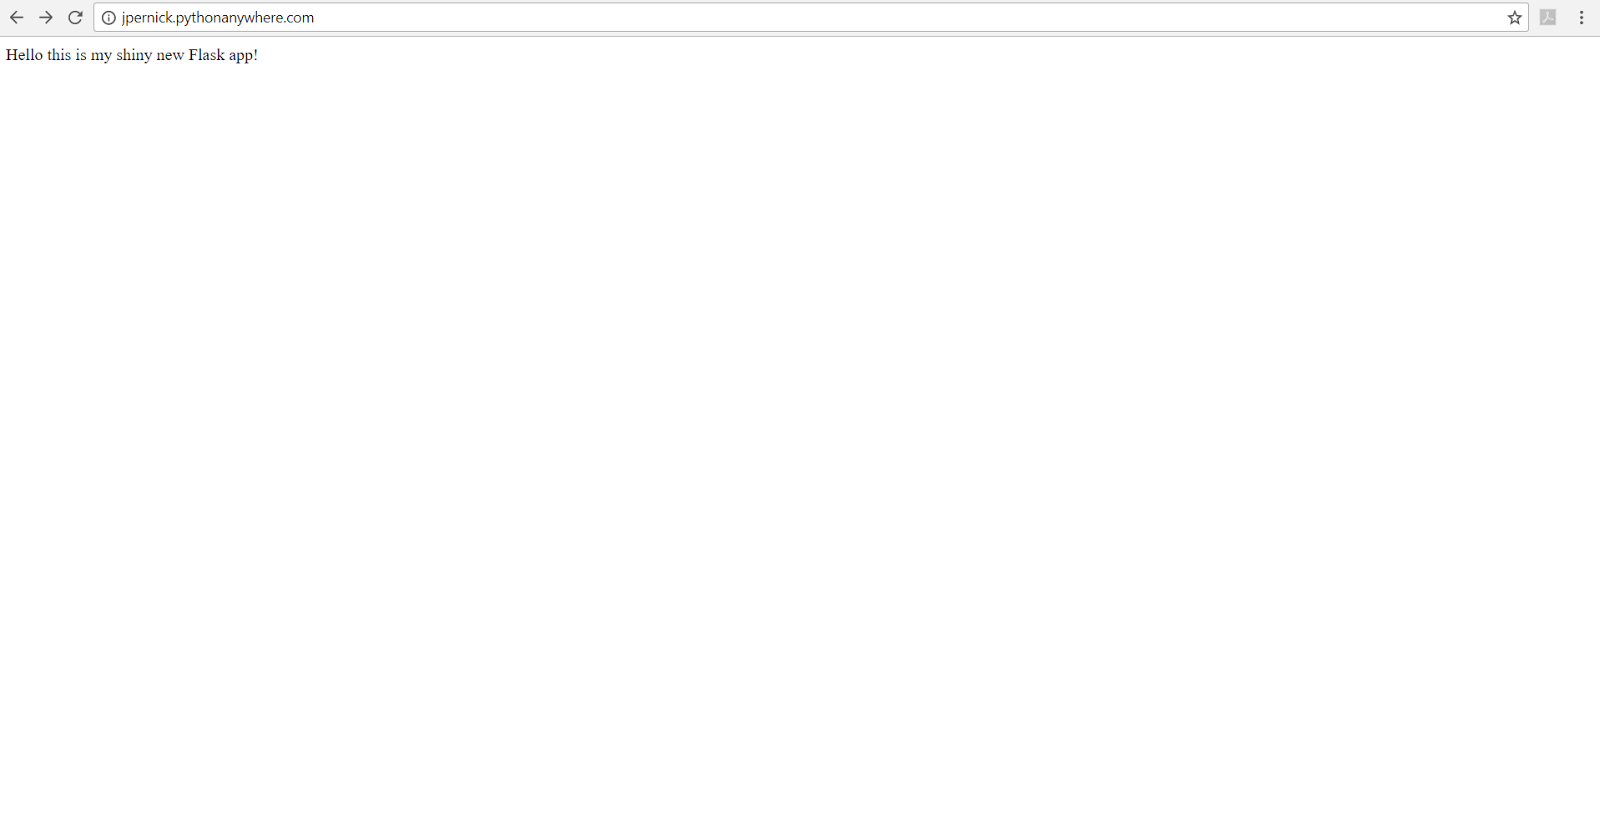
and after saving this and going to jpernick.pythonanywhere.com we can see this:
Template
The next thing I did was design a template for the main page. I did this by clicking in the create new directory text box and creating a directory called templates. I then created the file main_page.html. The file tree now looks like this:


Next I updated the main_page.html file to look like this:

The next step is to update the original source code to render this template, I changed the flask_app.py code from the original:

to this:

After saving the app this is what I get:

If I try to add this comment though, I get this error:

which actually makes perfect sense because we did not write any code to handle this. So I did that next. What this error means is that I tried to send data to the page, but it is not configured to accept it. The first thing I did was edit the code in flask_app.py from:
to this:
After this change, now I won't get an error when I try to post it, but it will just return the same page and forget about the comment. What I need to do next is connect to a database.
Database
In order to create a database I went to the databases tab and entered in a password that I will use when I want to access it, and then clicked the initialize button. The tab looks like this.

Now I am given the option to create a database, I typed in comments and clicked create.

Next week I will show how to make changes using the database. Thank you for reading! Please comment anything you would like to see.
-Joe


 index.html
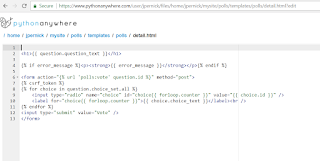 details.html
 results.html